Tie-Dyed Coffee Filters Craft Project – Inside With Kids
Sometimes it is fun to relive your own childhood and share it with your little ones. Making tie-dyed coffee filters was a part of my childhood in Idaho. I first made them at my Aunt Judy’s house with my cousin Jessy when I was maybe 10 or so. Aunt Judy seemed to always be making fun crafty things at her house. Later, tie-dyed coffee filters became a babysitting activity staple for me that I always had handy in my babysitting bag. Now I get to make them with Jimmy and pass the memories on. So far it has been a hit.
These tie-dyed coffee filters are really fun to make. It seems that kids of all ages love this simple little craft, from preschoolers to high schoolers. Plus, moms love it too because it is so simple, practically mess free, and made with things that you already have on hand. Who knew that coffee filters could be used for more than just brewing some coffee? I hope this step-by-step tutorial will spark some joy and creativity in your little ones as we navigate this crazy time of life together. It’s a fun one, and I hope you enjoy it!

What You Will Need:
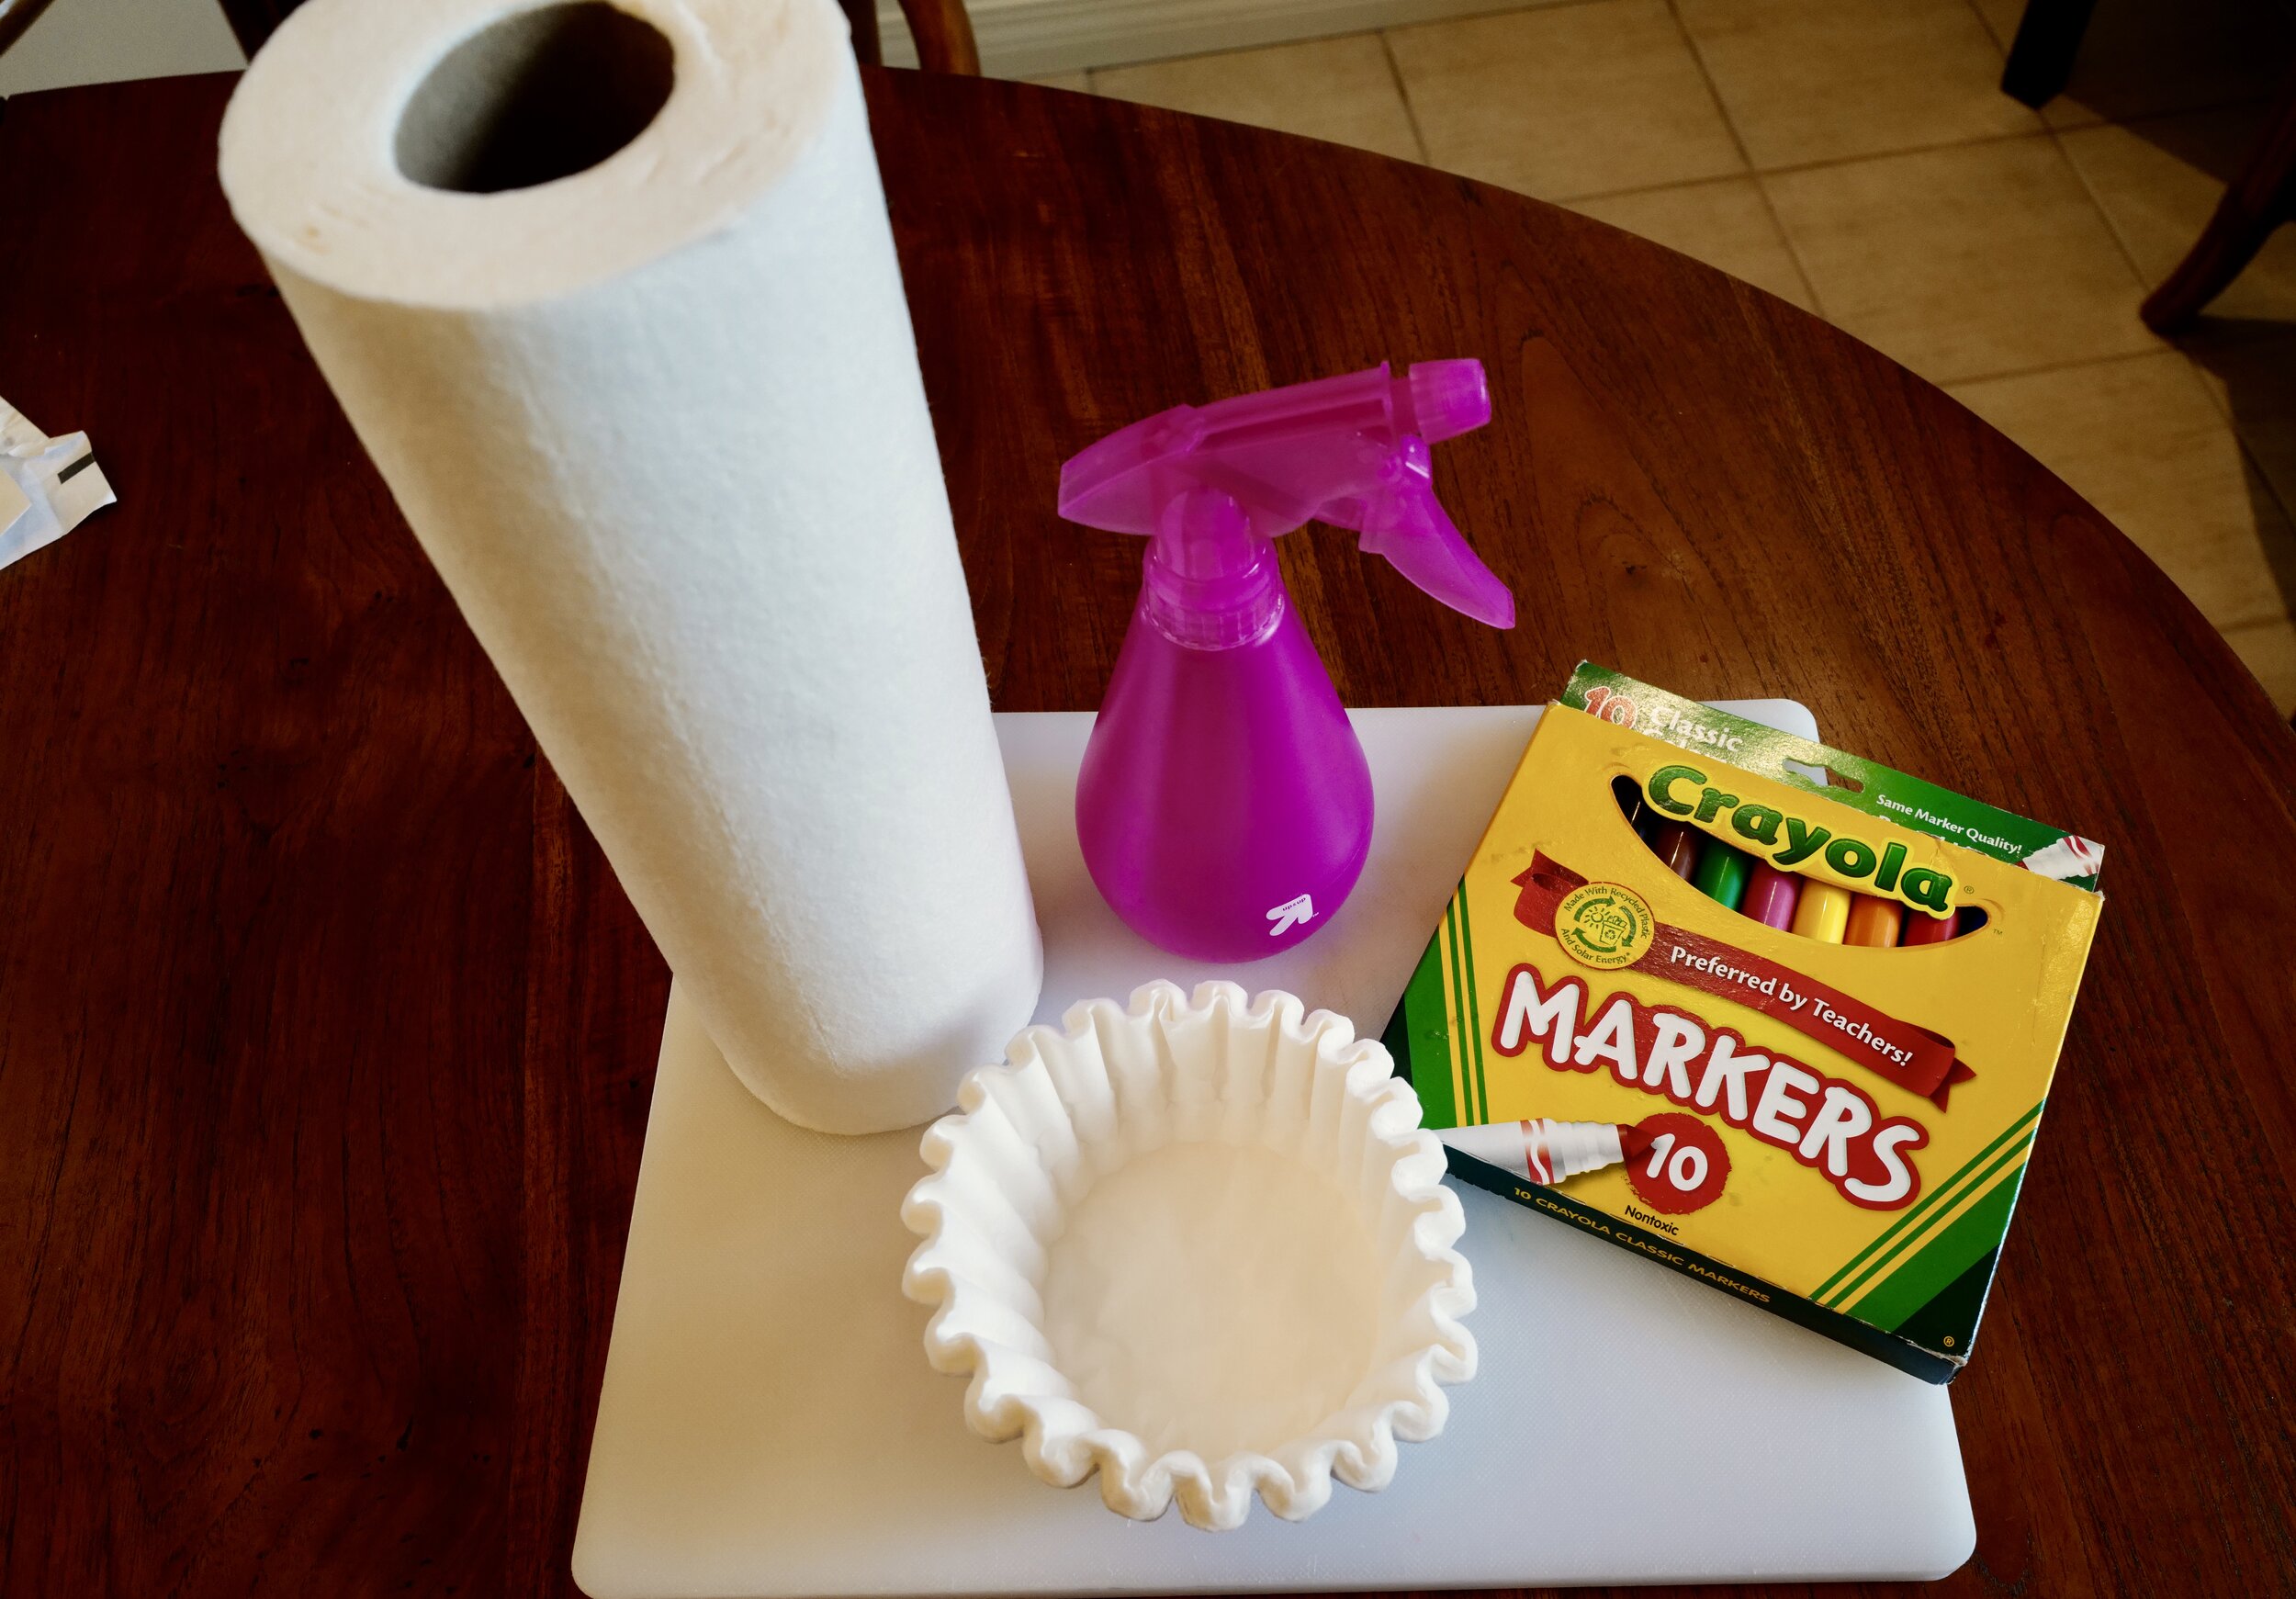
white coffee filters
washable markers (I prefer Crayola brand)
spray bottle filled with water
paper towels or napkins
cutting board or other surface that can get wet and messy
How to Make Tie-Dyed Coffee Filters
Step 1:
Grab one coffee filter. Fold the coffee filter neatly in half making sure all of the sides line up evenly.

Step 2:
Fold the coffee filter in half again, creating this triangular shape. Make sure all of the sides are folded evenly with nice sharp creases.

Step 3:
Use the markers to create a design of your choice. Only color on one side of the coffee filter. This is where you can get creative and let your child do whatever design they wish! Circles, zig zags, lines, swirls, you name it. There is no wrong way here. I recommend using more than one color of marker for optimal results. Press down firmly with the marker when coloring your design so enough ink flows out. Coloring too lightly will cause the design to not come out as well.

Step 4:
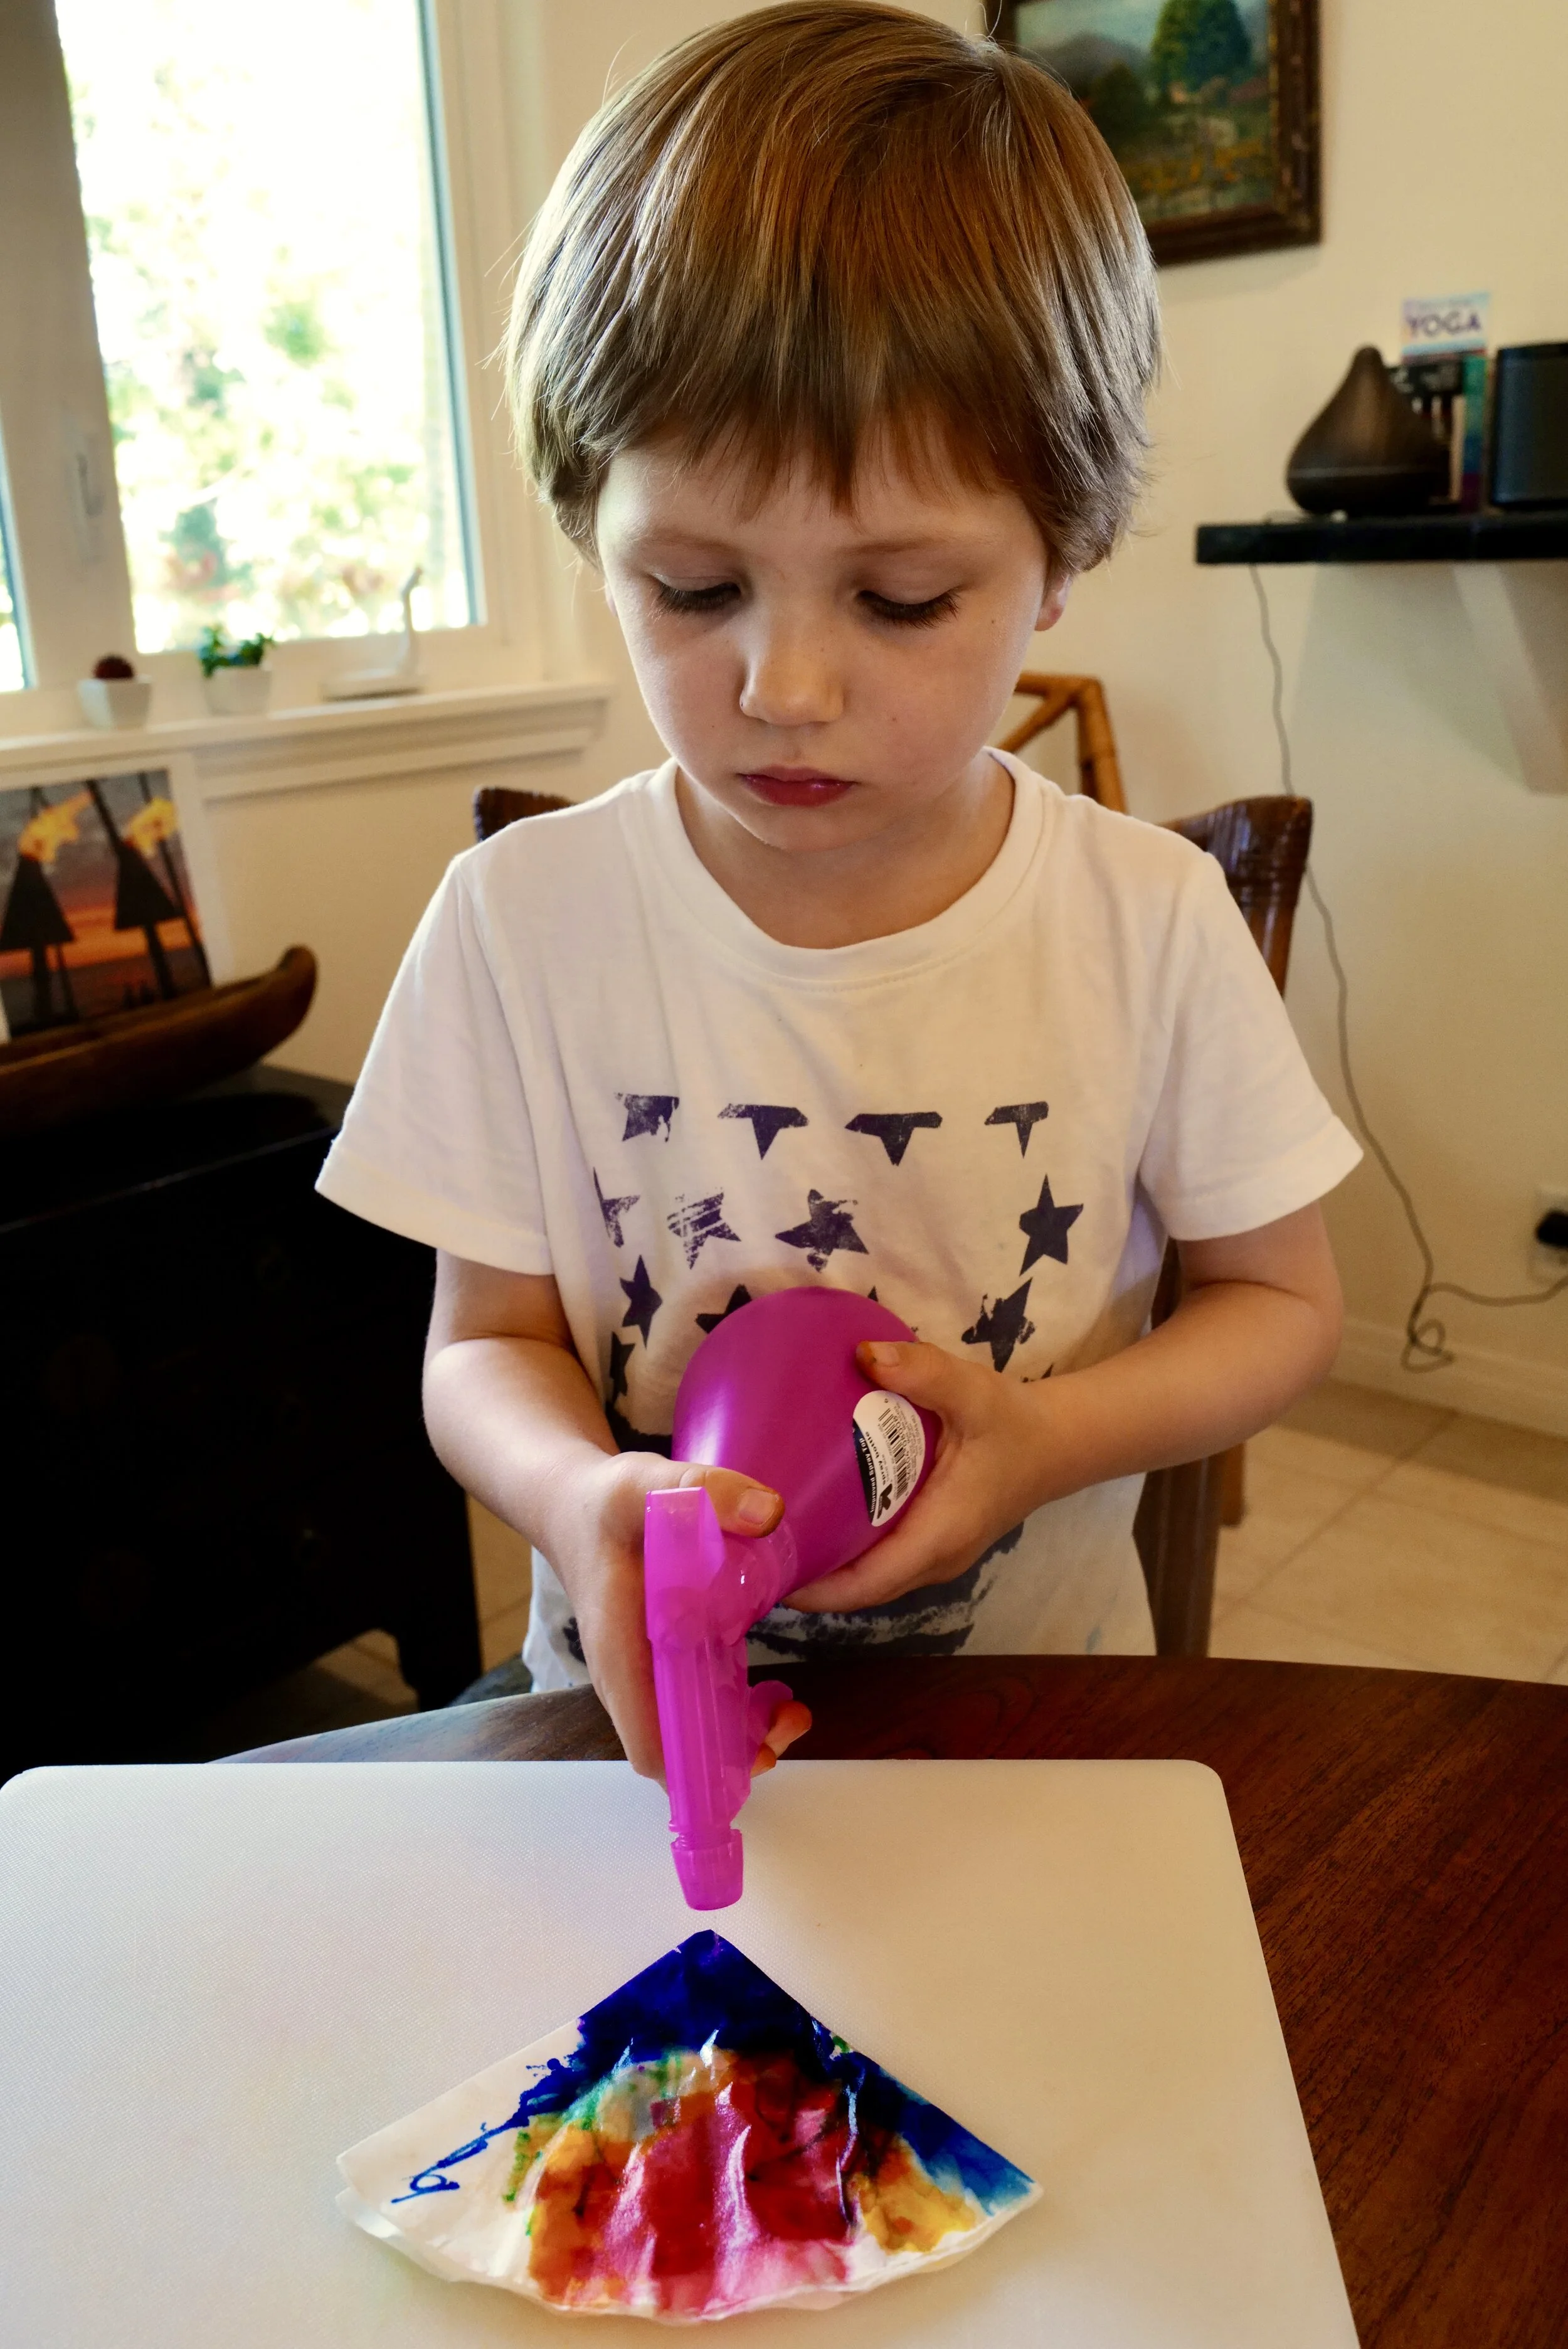
Place your designed coffee filter on a surface that can handle some color and water. We did ours on a cutting board. Spray water from the spray bottle onto the coffee filter. Make sure the whole surface is sprayed with water, but don’t overdo it. Watch as the colors bleed together and make a beautiful design.

Step 5:
Blot the coffee filter with a dry wadded up paper towel. Turn the paper towel around occasionally to use the clean sides when possible to avoid mixing colors.

Step 6:
Open the folded wet coffee filter and see how your design came out!

Step 7:
Take your coffee filter and hang it somewhere to dry. We hung our wet coffee filters outside to keep the color from staining any inside surfaces. Grab another coffee filter and repeat. Every coffee filter will come out looking different and unique, making it such a fun project that will entertain children for hours!

Final Thoughts
Jimmy doesn’t have a very long attention span for anything. He enjoys many different activities but usually for only a short period of time and then we wants to move on to something else. . . except for these tie-dyed coffee filters. He loves making these and did it for at least an hour the first day! Then when Nate came into the kitchen later, Jimmy taught him how to make them, step-by-step. He asked Nate, “Are you enjoying this Dad?” Then he requested that Nate watch him make some more to “see how they come out.” Jimmy would make one and then excitedly run outside to hang it out to dry and then run back inside again and start making another one. The next day when I asked him what he wanted to do he said that he wanted to make these again. Children love these things!

All of the coffee filters that Jimmy designed. I love how they are all unique and different.
I hope you and your children love making these tie-dyed coffee filters as much as we do! It is a great activity to do at home especially when you are stuck inside. Have fun, and let me know what you think!